Tutorial How to build your own vakuum refill tool: DIY vacuum refilling tool for Canon and HP cartridges
Our Druckerchannel-Member "Nochwas![]() " was always annoyed over the high marketing price point with these professional refilling tools
" was always annoyed over the high marketing price point with these professional refilling tools![]() and he decided without further hesitation to build his very own device from scratch which also utilizes the vacuum suction method and would sum up to just a little amount of money.
and he decided without further hesitation to build his very own device from scratch which also utilizes the vacuum suction method and would sum up to just a little amount of money.
What is so important or breathtaking with this kind of refilling technique: You won’t require drilling empty cartridges and sealing them afterwards. Instead of that vacuum refilled cartridges are just good as a brand new ink cartridge except for the fact that the ink itself it non OEM and the original cartridge chip requires resetting. What this basically means is vacuum refilled cartridges would never accidentally leak ink and they are faster and cleaner to refill compared to other methods we are aware of (German "Druchstich" method egg.)
The DIY Solution vacuum refilling tool would enable you the refill and prime all Canon SingleInk cartridges . This would even work for the very common HP-Patronen Nr. 364![]() as well. I am personally refilling for now over two years Canon CLI-512 and the corresponding black counterpart PGI-520 inks. Until now I only had good results and experience with it.
How the vacuum refilling tool works is very delicately described in this topic: Test: Refill-Werkzeug Fill Bill 2 und HpCaJig
as well. I am personally refilling for now over two years Canon CLI-512 and the corresponding black counterpart PGI-520 inks. Until now I only had good results and experience with it.
How the vacuum refilling tool works is very delicately described in this topic: Test: Refill-Werkzeug Fill Bill 2 und HpCaJig![]() .
.
Your require these parts to build your own DIY refiller
- Two small clamps - one is designated soley for the black ink cartridge and the other one for the rest color cartriges. You can find these kind of clamps in almost any hardware tool store or the usual suspects online with various merchants. Local stores charge approx. EUR 3,- each.
- Four 60ml syringes (I am using 4 syringes for four individual colors, since I don't like to add cleaning rinsing and drying to my refilling workflow its simply easier this way).
- Of curse Aftermarket ink (refilling ink).
- Four cannulas (needels for the syringe).
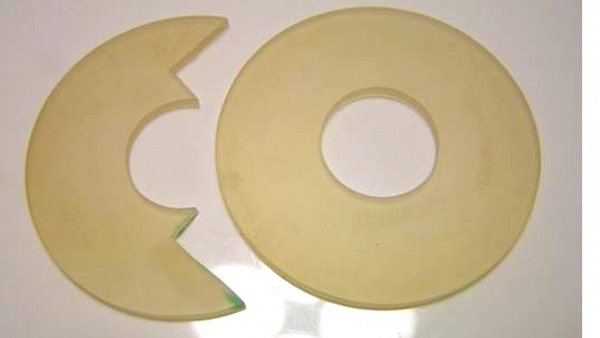
- For each individual cartrige you will require the original orange plastic end cap - If you dont have them anymore they are wide available as used and bundled items on the biggest online auctionmarketplace- duh.
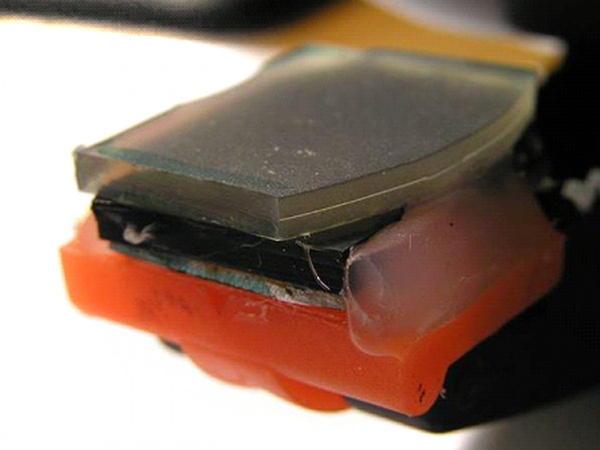
- To seal the airflow intake on the cartriges you will need a small piece of metal plate and a piece of sealing rubber. Use some rubber compatible super-glue and glue both pieces. The piece of rubber I am using is harvested from a toilet tank sealing gasket (check either eBay or your local hardware store) Note: the rubber has to be soft.
- A hot glue gun.
- Drill bit for drilling metal as thick as your cannuals.
- additionally a tiny rare earth magnet and two metal bookends to build a crafty little stand for our refilling tool.
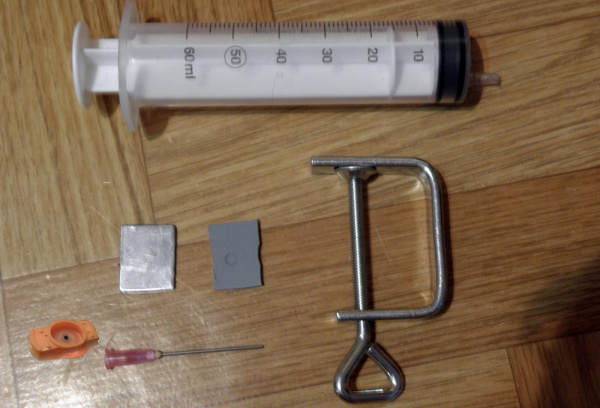
 What you'll need for the vacuum refilling tool: Screw clamp, syringes, cannulas, original orange plastic end cap, small metal plate and a piece of rubber.
Construction manual
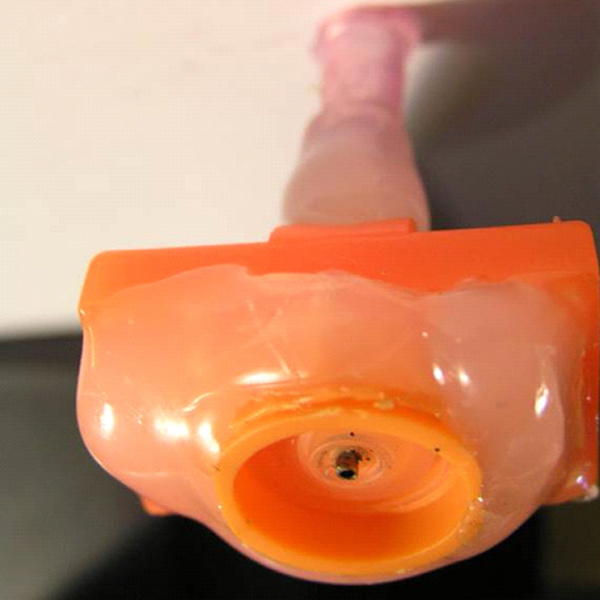
Screw down the clamp and mark with a felt pen where the round part of the screw clamp reaches the opposite side. Drill a hole in the clamp - the hole should have a diameter of the cannula and deburr if necessary. Now drill a hole throug the middle of the orange end cap.
Put the cannula tentatively in the drilled hole in the clamp. Put also the orange end cap over the cannula. Mark the cannula with a felt pen where the cannula comes out of the orange end cap (see picture below). Pull out the cannula and shorten it carefully at the marked point. The cannula should now line up precisely with the orange end cap.
Glue the cannula and the orange end cap to the screw clamp. Use hot glue to seal everything airtight. Make sure not to seal the hole of the cannula.
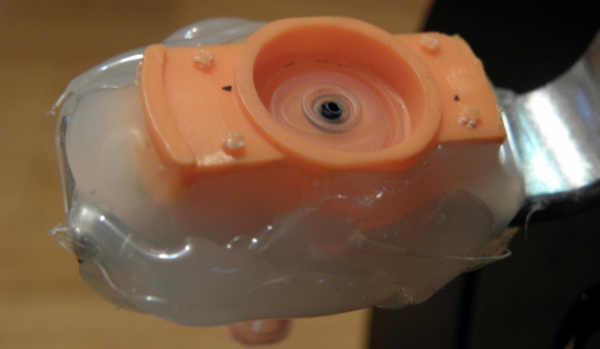
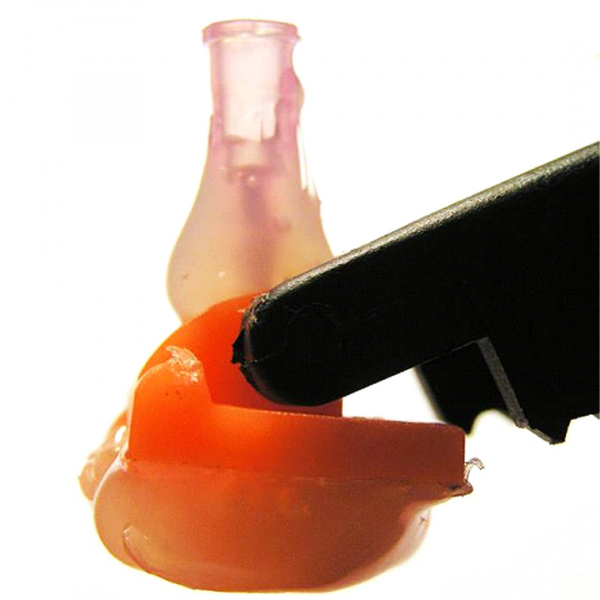
After cooling down of the hot glue you can give it a first try: Use an empty cartridge an put it in the orange end cap of the clamp. Now clamp the small piece of metal plate and the piece of sealing rubber beneath on the vent hole of the cartridge. Don't screw the clamp to tight - it just should seal the vent hole airtight.
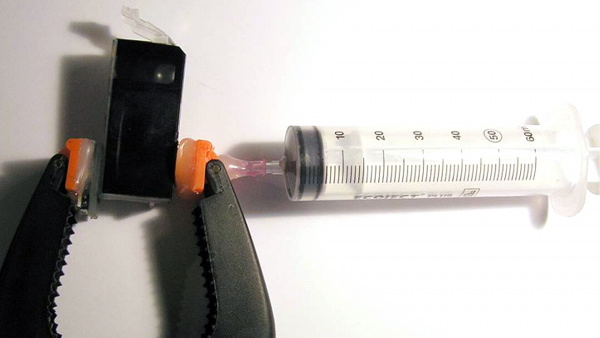
Pull the required amount of ink (see table below) in the syringe und put it on the cannula.Important: Do not press the plunger down! Pull the plunger vigorous upwards. Thereby a vacuum will occur in the cartridge. Let the plunger go and the cartridge sucks the ink out of the syringe.
If you haven't glued everything perfect, air will pour into the system and you can't reach the necessary vacuum. You'll realize that if you feel not much counteraction when pulling the plunger. You can have a look at the refill procedure in the following video at 2:20 minutes:
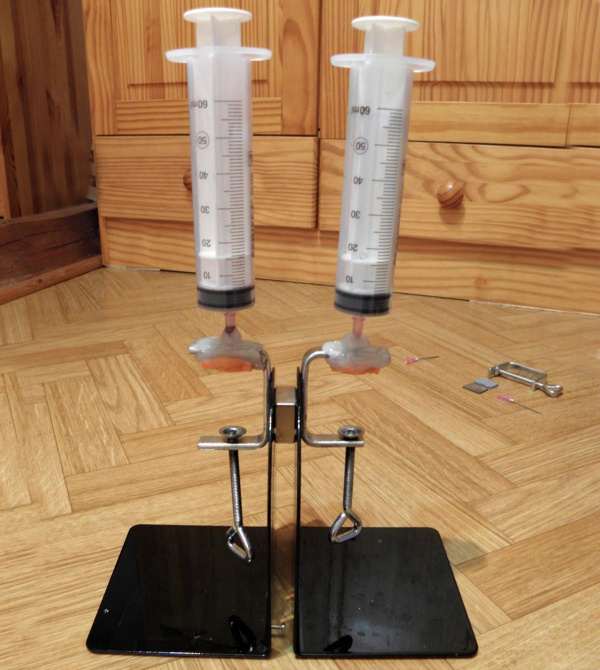
The black cartridges have a larger ink outlet. Therefore you should bulild another clamp with the bigger orange end cap for the black cartridges.
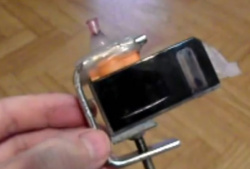
To secure both clamps in place I utilize a neodym magnet. Simply put the magnet in between the book stands. This solution is convenient since its a strong bond but you can still twist and flex the connection to clean the clamps if any spills occur and reattach them with a simple "click".
 DIY Step-by-Step Video: Well this is the Video everything explained step by step, but is narrated in german.
| Cartridge weights an filling quantity | |||
|---|---|---|---|
| empty cartridge | full cartridge | filling quantity | |
| HP-cartridges | |||
| HP No. 364 color cartridge | 17 g | 23 g | 6 ml |
| HP No. 364 XL color cartridge | 17 g | 30 g | 13 ml |
| HP No. 364 black cartridge | 20 g | 32 g | 12 ml |
| HP No. 364 XL black cartridge | 20 g | 42 g | 22 ml |
| HP No. 920 XL color cartridge | 20 g | 28 g | 8 ml |
| HP No. 920 black cartridge | 20 g | 32 g | 12 ml |
| HP No. 920 XL black cartridge | 20 g | 42 g | 22 ml |
| Canon-cartriges | |||
| CLI-8 color cartridge | 15 g | 28 g | 13 ml |
| PGI-5 black cartridge | 20 g | 46 g | 26 ml |
| CLI-521 color cartridge | 12 g | 22 g | 10 ml |
| PGI-520 black cartridge | 19 g | 34 g | 15 ml |
| CLI-526 color cartridge | 12 g | 22 g | 10 ml |
| PGI-525 black cartridge | 19 g | 34 g | 15 ml |
| CLI-551 color cartridge | 15 g | 22 g | 7 ml |
| CLI-551 XL color cartridge | 14 g | 24 g | 10 ml |
| PGI-550 black cartridge | 20 g | 34 g | 14 ml |
| PGI-550 XL black cartridge | ?? g | ?? g | 22 ml |
| Copyright Druckerchannel.de | |||
Alternative method with a spring clamp
According to this principle you can also build a vacuum refilling tool by using a spring clamp with flexible swivel shoes. You'll find spring clamps in hardware stores for less then two Euros. As described above you also work with a rubber seal from a toilet tank. Just cut out the necessary piece of rubber.
Drill a hole in on of the swivel shoes where the cannula goes through. Try to drill past the metal shaft oft the swivel shoe. The hole should be in the middle. Hot glue the shortened cannula and the orange end cap airtight to the swivel shoe.