Workshop: Replace waste ink tanks of Epson C & D-models
von Frank Frommer
übersetzt von Ulrich Junker
Erschienen am 9. Juni 2011 bei Druckerchannel.de, 13 Seite(n)
https://www.druckerchannel.de/artikel.php?ID=3016
Step 1: Remove the side covers
If you own an Epson Stylus D68, begin the procedure on page 8, since it´s construction is different.
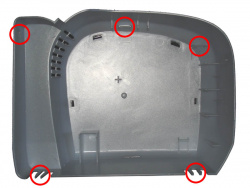
As a first step remove the side covers. Carefully open the fastening clips, using your hand or a flat-headed screwdriver. Apply pressure in the places marked by red circles and arrows. There are a few things you should also consider.

 Interior view of the left side panel: The clips marked red have to be released to remove the side panel.
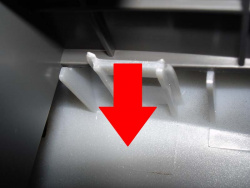
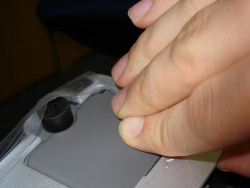
A little awkward to reach are the two clips inside the case. Take a good look at the picture and feel your way with your fingers. The clips have to be pressed downwards to remove the side panels.
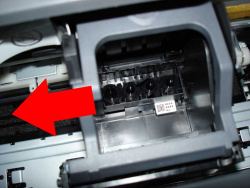
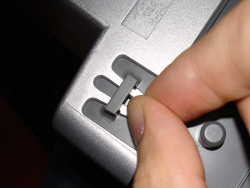
To get to the clips on the right side, it is necessary to loosen the printhead latch (see picture). Then gently push the print head mount to the left (i.e. out of your way).

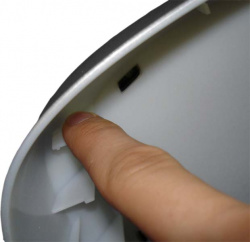
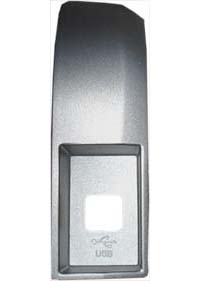
On the left side you first have to insert a long, hard, and thin object into the narrow opening (a slot bracket is suitable, for example), to remove the cover of the USB interface.
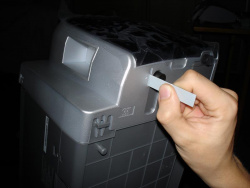
The left side panel has 4 clips only. Although they are marked with an arrow, a screwdriver will not help here.
The best solution is to first open all other clips, then draw the side cover across the dark gray increase.
With stiff clips you can prevent damage to the printer´s housing by covering the screwdriver with a handkerchief